How to Release AI Chatbot on Render
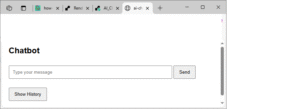
We have developed a chatbot using Python, Flask, and OpenAI, you might be wondering how to bring it to life on the web. One of the easiest and most developer-friendly platforms to do that is Render.
In this post I’ll walk you through how to deploy your chatbot on Render, from setup to final launch.
Prerequisites
Before deploying, make sure you have:
✅ A working chatbot app written in Flask
✅ A GitHub repo containing your project
✅ A requirements.txt file
✅ A gunicorn start command
✅ An .env file locally (you’ll set env vars in Render later)
✅ A Render account (free tier is enough for testing)
Step 1: Project Structure
Here’s a typical structure of your chatbot project:
AI_Chatbot/
├── chatbot.py
├── app.py (optional)
├── requirements.txt
├── .env (not pushed to GitHub)
├── static/
├── chatbot.db
└── README.md
Step 2: Create requirements.txt
Render uses this to install dependencies. You can generate one with:
pip freeze > requirements.txt
Make sure this includes key packages:
Flask
openai
python-dotenv
gunicorn
Step 3: Add Gunicorn for Deployment
Gunicorn is a WSGI HTTP server for UNIX. Add this to your requirements.txt if it’s not there:
gunicorn chatbot:app
Your start command for Render will look like:
gunicorn chatbot:app
Step 4: Use Environment Variables
You should not hardcode your OpenAI API key. In chatbot.py:
from dotenv import load_dotenv
import os
load_dotenv()

client = OpenAI(api_key=os.getenv("OPENAI_API_KEY"))
.env (do NOT upload to GitHub):OPENAI_API_KEY=your-key-here
Step 5: Push to GitHub
Commit your code and push your project to a GitHub repo:
git init
git add .
git commit -m "Initial commit"
git remote add origin https://github.com/your-username/AI_Chatbot.git
git push -u origin main
Step 6: Deploy to Render
-
Go to https://render.com
-
Click “New + > Web Service”
-
Connect your GitHub repo
-
Fill in details:
-
Name:
ai-chatbot -
Runtime: Python (python xx)
-
The Git branch to build and deploy. : main
-
Your services in the same region can communicate over a private network. You currently have services running in oregon.
- Root Directory: Optional
-
-
- Build Command: (Render runs this command to build your app before each deploy)
pip install -r requirements.txt
- )Start Command: (Render runs this command to start your app with each deploy
gunicorn chatbot:app
5. Under Environment, add this:
-
-
Key:
OPENAI_API_KEY -
Value: (Your actual OpenAI key)
-
Note:
if you can't see Envirenment  look this
 url:  https://dashboard.render.com/web/srv-d0qva1ruibrs73f02640/deploys/dep-d0rjvi3e5dus7381cnc0)
6. Click “Deploy Web Service”
Step 7: Find Your Public URL
After successful deployment, Render shows:
==> Your service is live 🎉
https://ai-chatbot.onrender.com
Troubleshooting
✅ “gunicorn: command not found”
Make sure:
-
gunicornis in yourrequirements.txt -
Your start command is lowercase:
gunicorn, notGunicorn
✅ API key not working?
Render doesn’t read your .env file. You must set your key via Dashboard > Environment > Add Env Variable.
✅ 0.0.0.0:10000 not working?
That’s an internal port. Use the public link shown in the dashboard.
💾 SQLite Notes (Optional)
If your app uses sqlite3 for a simple database, Render supports this but note:
-
The
.dbfile must be inside your repo (read-only on Render) -
Avoid write operations unless using a persistent disk
Sample DB interaction:
import sqlite3
conn = sqlite3.connect("chatbot.db")
cursor = conn.cursor()
cursor.execute("SELECT * FROM chats")
rows = cursor.fetchall()
📱 Bonus: Use on Mobile
Once your chatbot is deployed, you can:
-
Access it on any mobile browser via your Render URL
-
Wrap it as a mobile app using tools like:
-
Flutter WebView
-
React Native + WebView
-
CapacitorJS (Ionic)
-
🏁 Conclusion
Deploying your Python chatbot on Render is one of the easiest ways to go from local development to a production-ready, cloud-hosted app — no infrastructure headaches required.
You now have:
✅ A working chatbot
✅ Live on a public URL
✅ Secure API handling
✅ Scalable deployment for free (starter tier)
🧑💻 Author
Built with ☕, Flask, and OpenAI by Mehrdad Zandi
Follow my blog for more AI, deployment, and Python tutorials.
My next post is: Migrate Chatbot from SQLite to PostgreSQL
This post is part of AI (Artificial Intelligence) step by step

