Create Azure Function App in .NET C# and Deploy to Azure
In this post I am going to create an Azure Function App with following steps:
- Create a Function App in the Azure Portal
- Create an Azure Function project in Visual Studio 2022
- Deploy Function App onto the Microsoft Azure.
- Test the function in Azure
- Implementing new function Multiple in Visual Studio
- Publishing this new function to Azure
- Testing the new function in Azure
What Azure Function(Functions)?
Azure Functions is the Serverless service on Microsoft Azure. provides an event-driven, serverless platform to solve problems using various programming languages. Azure Functions allows developers to focus on problem-solving instead of dealing with a web server or application hosting.
For more about Azure Functions look to one of my previous post Azure Function
Now let’s go implementing of step 1.
Create a Function App in Azure Portal
- Log in your Azure account, if you haven’t any account create a free account.
- Press to + Create Resource button, search for Function App , then press to the Function App ,
- Select Basic tab
- Fill the following as shown in the bellow:
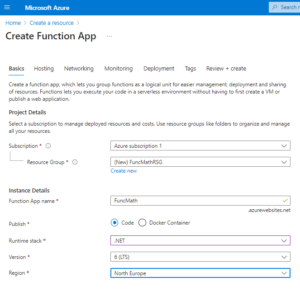
Here I have given the following names:
- Resource group name : FuncMathRSG
- App Name: FuncMath
- Publish: Code
- Runtime stack: .NET, latest
- Region : North Europe
- Operation System: Windows
- Plan type: Consumption (Serverless)
5. select next tab Hosting and write a new name for Storage account, I have give the name funcmathstoreageac as seen in the following image:
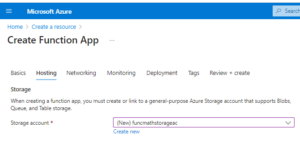
Function App requires Storage account which will hold our implemented code, log data, and other information. for more about Azure Storage look to the Introduction to Azure Storage
6. Select Networking then you see that it is not available for consumption plan that we have choose in step:4 when we choose basic tab. and your see the following Note.
Note: Network injection is only available in Functions Premium and Basic, Standard, Premium, Premium V2, Premium V3 Dedicated App Service plans.
7. Select Monitoring tab and you see the following image:
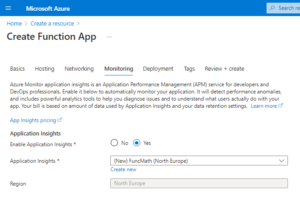
By default
8. Select next tab: Deployment as seen in the following image:
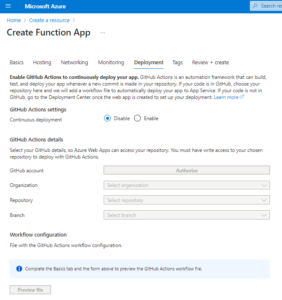
In the figure above I have taken the option continuous deployment as default which is disabled. You can enable this to let GitHub Actions to continuously deploy your app. GitHub Actions is an automation framework that can build, test, and deploy your app whenever a new commit is made in your repository.
9. Select Tag tab then you see the following image:
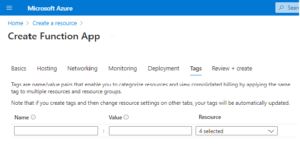
In the above figure I have take it as default not giving name and value, name/value pairs that enable you to categorize resources and view consolidated billing by applying the same tag to multiple resources and resource groups. I let it be as default and going to the next step;
10- select the Review + create tab then shows summary of how we have configured Azure Function App as shows in the following image:
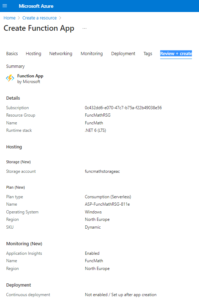
As we see in the above figure see the configuration of our Function Aapp that we have done from steps 4 to 9.
11. Press to the Create button and wait until the Function App is deployed.
12. press to Go to Resources then the created Function App is displayed as follow:
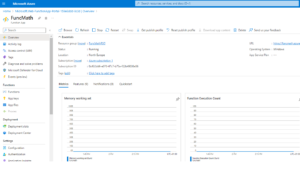
URL of this function is: https://funcmath.azurewebsites.net
Start your browser with this url:
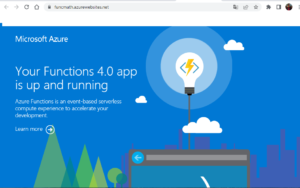
Now we have created our Azure Function App : FuncMath in Azure portal and it is time to go to the next step of this post and create an Azure Function project in Visual Studio 2022.
Create an Azure Function project in Visual Studio 2022
- Open Visual Studio 2022 and then select Create new project and then the next step search Azure Function and select Azure Function template as shown in the following image:
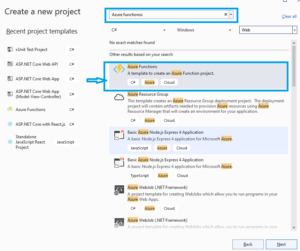
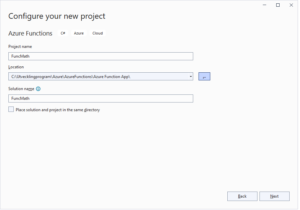
2. Press to Next button and give project name and location and let project name and solution name be the same as follow:
3. press to Next button and in the dialog and under Function select HttpTrigger and let the other options to be default as shown in the bellow:
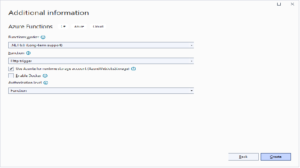
For Function dropdown there are queue triggers, HTTP triggers, blob triggers, timer triggers, and much more. for our Function I have selected the HTTP trigger, which creates a function that will run whenever it receives an HTTP request.
4. Press to Create button to create the project and then we see the following project Solution Explorer:
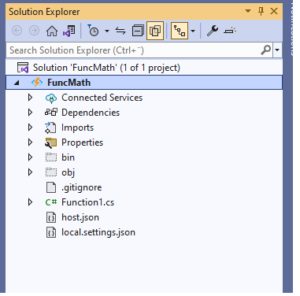
Right click on the project FuncMath and press to Properties then your output type of the project is Class Library, and the target framework is .NET 6.
Check the installed NuGet packages, by selecting Dependencies and Packages then we see Microsoft.NET.Sdk.Functionspackage contains everything we need to implement a basic Azure Function.
5. In Visual Studio Open the Function1.cs file. It contains the definition and implementation of the generated function. Let’s look at it in more detail.
using System;
using System.IO;
using System.Threading.Tasks;
using Microsoft.AspNetCore.Mvc;
using Microsoft.Azure.WebJobs;
using Microsoft.Azure.WebJobs.Extensions.Http;
using Microsoft.AspNetCore.Http;
using Microsoft.Extensions.Logging;
using Newtonsoft.Json;

namespace FuncMath
{
    public static class Function1
    {
        [FunctionName("Function1")]
        public static async Task<IActionResult> Run(
            [HttpTrigger(AuthorizationLevel.Function, "get", "post", Route = null)] HttpRequest req,
            ILogger log)
        {
            log.LogInformation("C# HTTP trigger function processed a request.");

            string name = req.Query["name"];

            string requestBody = await new StreamReader(req.Body).ReadToEndAsync();
            dynamic data = JsonConvert.DeserializeObject(requestBody);
            name = name ?? data?.name;

            string responseMessage = string.IsNullOrEmpty(name)
                ? "This HTTP triggered function executed successfully. Pass a name in the query string or in the request body for a personalized response."
                : $"Hello, {name}. This HTTP triggered function executed successfully.";

            return new OkObjectResult(responseMessage);
        }
    }
}
On line 15, we have the FunctionName attribute. It defines the name of the function. We can name the class containing the function different from the name of the Azure function. I am changing the name to FuncMath for both the class and the function which we have given name of function to this in Azure portal with creating of our Azure Function APP, and the new code shall be seen as follow:
sing System;
using System.IO;
using System.Threading.Tasks;
using Microsoft.AspNetCore.Mvc;
using Microsoft.Azure.WebJobs;
using Microsoft.Azure.WebJobs.Extensions.Http;
using Microsoft.AspNetCore.Http;
using Microsoft.Extensions.Logging;
using Newtonsoft.Json;

namespace FuncMath
{
    public static class FuncMath
    {
        [FunctionName("FuncMath")]
        public static async Task<IActionResult> Run(
            [HttpTrigger(AuthorizationLevel.Function, "get", "post", Route = null)] HttpRequest req,
            ILogger log)
        {
            log.LogInformation("C# HTTP trigger function processed a request.");

            string name = req.Query["name"];

            string requestBody = await new StreamReader(req.Body).ReadToEndAsync();
            dynamic data = JsonConvert.DeserializeObject(requestBody);
            name = name ?? data?.name;

            string responseMessage = string.IsNullOrEmpty(name)
                ? "This HTTP triggered function executed successfully. Pass a name in the query string or in the request body for a personalized response."
                : $"Hello, {name}. This HTTP triggered function executed successfully.";

            return new OkObjectResult(responseMessage);
        }
    }
}
in the line 16, we have the Run(…) method. This method has two arguments:
- The first argument of the Run method is of type HttpRequest. It also has an attribute of type HttpTrigger. This definition is telling Azure Functions that the function should be run whenever the HttpTrigger gets executed.
- The second argument of the Run method is a logger. Logging is important when dealing with Azure Functions , it helps you to be sure and you understand what happens or doesn’t happen in your system.
This method has a response message (responseMessage) as name query argument and writes a response message depending on a name is provided in the HTTP request.
Running and Testing the Function App
In visual studio press to F5 (or FuncMath on the main menu) then the function is executed and a console (command prompt is opened) as following:

This give us function : FuncMath: [GET,POST] with URL http://localhost:7091/api/FuncMath.
I am opening web browser and give the above URL then we see the following:

It ask us: Pass a name in the query string.
I give a name query ?name=Mehrdad as following query in the same web browser :
http://localhost:7091/api/FuncMath?name=Mehrdad
the result give us: Hello, Mehrdad. This HTTP trigger function executed successfully.
And this is the Http trigger function that we have select under option function with creating in Visual Studio in step: 3.
Now let’s publish and deploy the Function App to Microsoft Azure.
Publish and Deploy the Function App to Azure
- In Visual Studio, right-click the project and select the Publish menu, and for Target select Azure: Publish your application to the Microsoft Cloud as shown in the following image:
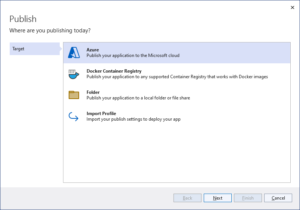
2. Press to Next button and for Specific target select Azure Function App on (Windows) as shown in the bellow:
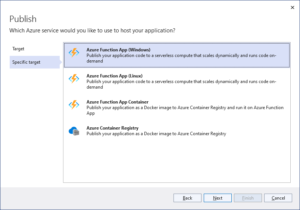
3. Press to Next button and Select Subscription name, and Function instance, select FuncMath (Consumption) which we have created in Azure Portal in beginning of this post in step: 4, as shown in the following image:
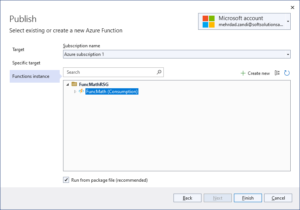
4. Press to the Finish button, it takes a while and then creates folders: Profile, Service dependency and more in the Visual Studio, Solution Explore and shows the following UI :
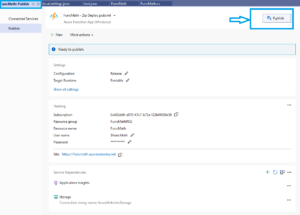
Now we have created Publish profile but haven’t deployed the app yet..
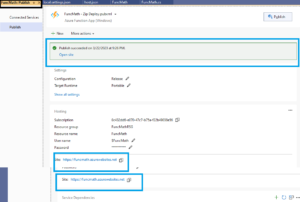
5. Press to the Publish button in the figure above To deploy the application to Microsoft Azure Function App (FuncMath). It begins to connect to publish target and It takes a few seconds to build and deploy the Function App. If the deployment is successful, we see all information:Publish Succeeded at the date x/x/xxxx as shown in the following image:
Testing the Function App on Azure Portal
- Start browser with with FuncMath url : https://funcmath.azurewebsites.net, then it show nothing is changed (nothing is deployed).
- In Azure Portal and open the Function App FuncMath and click on the Functions which is shown in the following image:
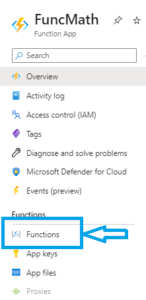
Select Functions for FuncMath functionsWe want to find all the functions which are implemented in the Function App: FuncMath. then it shows the following list of functions as shown in the following image:
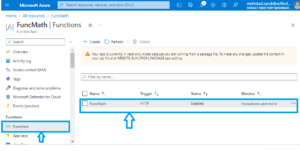
As shows in the above figure there is only one function FuncMath which is implemented.
3. Press to this function (FuncMath) then shows the following:
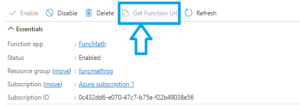
4. Press to the Get Function Url to copy the URl:

Here we see Url: https://funcmath.azurewebsites.net/api/FuncMath?code=LNvsH9AIsKB51G-Rfh3sgUdh1q_kKHsFyTf9BT0mnvotAzFu-FkRBg==
As we see this URL has a code parameter: code=LNvsH9AIsKB51G-Rfh3sgUdh1q_kKHsFyTf9BT0mnvotAzFu-FkRBg==
5. Start browser with this URL:

As we see HTTP triggered function executed successfully.
6. start browser with the second parameter &name=Mehrdad as follow:
https://funcmath.azurewebsites.net/api/FuncMath?code=LNvsH9AIsKB51G-Rfh3sgUdh1q_kKHsFyTf9BT0mnvotAzFu-FkRBg==&name=Mehrdad
Then we can get response: Hello, Mehrdad. This Http triggered function executed successfully.
Also we need a code parameter to run the Function App in the Azure.
Alternative:
we can find the code by clicking on the App key under Functions menu instead of click on Functions. When you click on the App key then on the right side show:
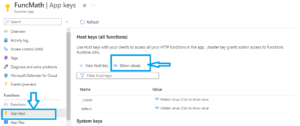
If you click on the Show values the you see two keys:

Take one of them as code parameter (e.g. default, _master)
Code= U1zKCSQqt9CEQcEt_wxcrDEkOACMtLqYXQpf2MQlRBqRAzFuB_vJlA==
Start browser with URL :https://funcmath.azurewebsites.net/api/FuncMath?code=U1zKCSQqt9CEQcEt_wxcrDEkOACMtLqYXQpf2MQlRBqRAzFuB_vJlA==&name=Mehrdad
Response shall be: Hello, Mehrdad. This HTTP triggered function executed successfully.
Now we have Implemented an App function in Azure and published and deployed to Azure Function App and tested the functionality.
The next step is change function code to implement Multiple function.
Source code can be found in my Github
Implementing new function Multiple
In this function we want to change code of our FuncMath function to implement multiplication of two numbers.
I rename both the class name and FunctionName attribute to Multiple.
I want to ask users to give two numbers and function give us multiplication of these two numbers. I remove the post parameter, and change the “async Task<IActionResult>” to “IActionResult” I want function reads the x and y arguments from the query string and parse them to an int variable.
After that multiplies values and store it in the multiple variable and print out the result.
The code of new function is as follow:
namespace FuncMath
{
    public static class Multiple
    {
        [FunctionName("Multiple")]
        public static IActionResult Run(
             [HttpTrigger(AuthorizationLevel.Function, "get",
            Route = null)] HttpRequest req,
             ILogger log)
        {
            log.LogInformation("C# HTTP trigger function processed a request.");

            int x = Convert.ToInt32(req.Query["x"]);
            int y = Convert.ToInt32(req.Query["y"]);

            var multiple = x * y;
            string t = multiple.ToString();

            string responseMessage = string.Empty;

            if (x == 0 && y == 0)
            {
                responseMessage = "This HTTP triggered function executed successfully. Pass x and y  in the query string for a personalized response.";
                return new OkObjectResult(responseMessage);
            }
            else
            {
                responseMessage = "Result =" + multiple.ToString() + " This HTTP triggered function executed successfully.";
                return new OkObjectResult(responseMessage);
            }
        }

    }
}
Test the new Function App in Visual Studio
In Visual Studio, press to F5 or press to FuncMath on main menu then the following shall be dispalyed:


Give the x and y parameters as following:
:http://localhost:7091/api/Multiple?x=2&y=5 in the browser above then displays the result of multiplication of x and y, as following:
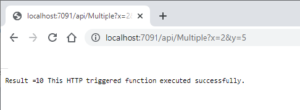
That is all Testing in your local machine.
Now we have created a new function in Visual Studio and tested it local, It is time to republish this function to Azure to update our previous function.
Republish the new function to Azure Function App.
- Back to Visual Studio and press to project FuncMath and press to the Publish button then you have the following UI:
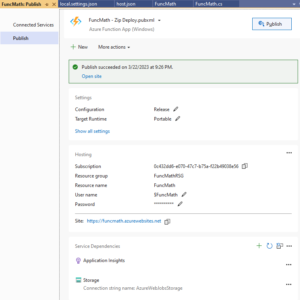
2. In the figure above press to Publish button in the upper right then it begins the publishing process and the following UI is displayed:
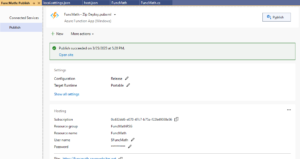
As we see publishing of new function from Visual Studio to Azure is succeeded.
Test of new Function in Azure
- Go back to Azure FuncMath and start browser with it url: https://funcmath.azurewebsites.net, this shows nothing is regarding the implementation.
- Go to the menu under FuncMath and select Functions under Function section as before and then shows list of function and you can find among them Multiple as shown in the following:
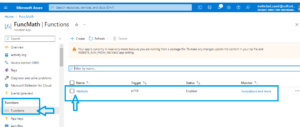
3. click on Multiple function as shown in the figure above then a new UI is opened, press to the Get Function Url on the menu, then shows the following image:

4. Copy the Url in the figure above: https://funcmath.azurewebsites.net/api/Multiple?code=wrzu7v9VWVXAdmrG2La5nqORtsd4kY-VTUBoCG_O1c_gAzFuvPgPcA==
5. Start broser with this Url and flow the instruction from the response of HttpTrigger, which says pass x and y as query string.
6. with pass of x and y query string to the Url above:
https://funcmath.azurewebsites.net/api/Multiple?code=wrzu7v9VWVXAdmrG2La5nqORtsd4kY-VTUBoCG_O1c_gAzFuvPgPcA== &x=4& y=6
7. Open browser with this url:

OK as we see in figure above we have got response: ” Result=24 Ths HTTP triggered function executed successfully.
Source code can be found in my Github
Clean up resources
In Azure, select Resource groups and then press to the FuncMathRSG, then in the menu press to the delete then confirm to delete it. It is created another Resource group: DefaultResourceGroup-NEU do the same procedure to delete this too.
Conclusion
In this post I have created Function App and named it FuncMath in the Azure Portal. Then created Function App with the same name function in Visual Studio 2022. First tested it local and then published to Azure Function App FuncMath. After that we have tested it.
We have changed the code in Visual Studio implemented Multiple function which multiplies two numbers and print out the result as response when user pass two numbers as a query strings. Tested this new function in Azure.
In my next post, I am going to describe: How to Consume Azure Function
This post is part of “Azure step by step