Create a static HTML web app by using Azure Cloud Shell
In this post, we’ll deploy a basic HTML+CSS site to Azure App Service by using the Azure CLI az webapp up command. and then update the code and redeploy it by using the same command.
The az webapp up command makes it easy to create and update web apps. When it performs the following actions:
- Create a default resource group if one isn’t specified.
- Create a default app service plan.
- Create an app with the specified name.
- Zip deploy files from the current working directory to the web app.
Download the sample app
In this section we’ll use the sandbox to download the sample app and set variables to make some of the commands easier to enter.
- start Azure Cloud shell (either your azure account or a Sandbox) and run the following commands
2. In Cloud shell create a directory (htmlapp) and then navigate to it.
<span class="hljs-built_in">mkdir</span> htmlapp

<span class="hljs-built_in">cd</span> htmlapp
3. Run the following git command to clone the sample app repository to your htmlapp directory.
git clone https://github.com/Azure-Samples/html-docs-hello-world.git
4. Set variables to hold the resource group and app names by running the following commands:
rpesourcGroup = $(az group list --query "[].{id:name}" -o tsv)
appName=azmyapp$RANDOM
Create the web app
1. Change to the directory that contains the sample code and run the az webapp up command.
cd html-docs-hello-world
 az webapp up -g $resourceGroup -n $appName --html
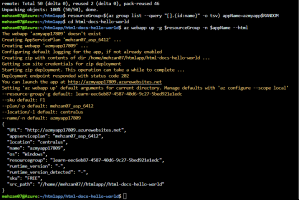
This command may take a few minutes to run. While running, it displays information similar to the example below

As you see from the figure above following json data is created:
{ "app_url": "https://<myAppName>.azurewebsites.net",
"location": "westeurope",
 "name": "<app_name>",
"os": "Windows",
"resourcegroup": "<resource_group_name>",
"serverfarm": "appsvc_asp_Windows_westeurope",
"sku": "FREE",
 "src_path": "/home/<username>/demoHTML/html-docs-hello-world ",
 < JSON data removed for brevity. > }
2- Open a new tab in your browser and navigate to the app URL (https://<myAppName>.azurewebsites.net) in my case the url is : http://azmyapp17809.azurewebsites.net and verify the app is running – take note of the title at the top of the page. Leave the browser open on the app for the next section.
Note: You can copy <myAppName>.azurewebsites.net from the output of the previous command, or select the URL in the output to open the site in a new tab.
Update and redeploy the app
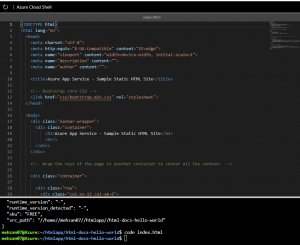
- In the Cloud Shell, type
code index.htmlto open the editor.

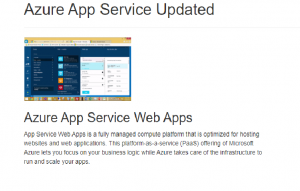
2. In the <h1> heading tag, change Azure App Service – Sample Static HTML Site to Azure App Service Updated – or to anything else that you’d like.
3. Use the commands ctrl-s to save and ctrl-q to exit.
4. Redeploy the app with the same az webapp up command you used earlier.
az webapp up -g <span class="hljs-variable">$resourceGroup</span> -n <span class="hljs-variable">$appName</span> --html 5. Once deployment is completed switch back to the browser from step 2 in the “Create the web app” section above and refresh the page.

Conclusion
We have created Azure Web App by using using Azure Cloud Shell and updated it and redeployed it.
My next post describes: Configure web app settings
This post is part of “Azure step by step


