Build React App With .NET Core Backend
React is a javascript library for building web apps and it doesn’t load itself in the browser. We need some kind of mechanism that loads the index.html (single page) of React with all the dependencies(CSS and js files) in the browser. In this post, we are using .NET Core Web API which loads React app and accepts any API calls from the React app.
In this post, I will show how to implement React as UI with .NET Core as a Web API and how these interact with each others.
I am building a Demo project with name Students which user can add a student with name after name and email to store in a memory database in .NET Core, And he/she can retrieve all students and show them.
Architecture
Communication between React App and .NET Core shown in the bellow:

The web requests via .NET Web API will go to React routing. .NET Core API. handles data access (save/retrieve data)
before begin to work, you should have installed the followings in you computer:
After installation check the .NET Core version with the following command
dotnet --version
For React library, you can look to my previous post: Getting Started with React
In this post first I create a template for both React App and .NET Core App via command line which creates a Student project where React App as UI and .NET Core App as an API to communicate with React App and present the UI on the Browser.
We will have a basic app which we can add Students (First name, Last name, Email) and then we want to retrieve number of students, and display these at the website, when we want.
How To Build and Develop The Project
First we want to develop and build and after that we will run in production.
Now we began with development phase:
Generate whole project (React + .NET Core ) template with this command:
dotnet new react -o <project name>
In my case: project name is Students.
You can choose a location in your computer (C disk) and start command line in the folder that you want to create the Students project.
In my case I am start command line in the path: C:/React.
dotnet new react -o Students
After running this command a template is created under C:/React/Students and this is just a template not more
If we open Students Folders in VS Code then we see the following structure:

dotnet run


And then opens the browser and shows the following:
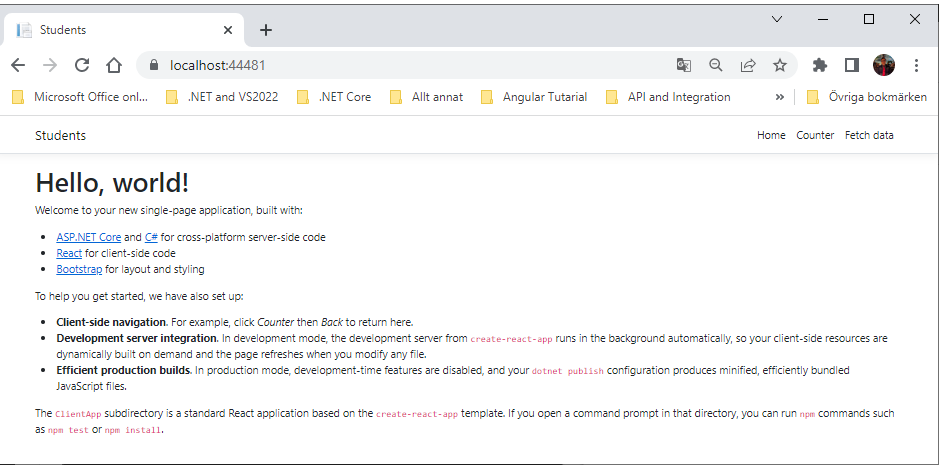
From the webbrowser we see the follwoing information:
Welcome to your new single-page application, built with:
- ASP.NET Core and C# for cross-platform server-side code
- React for client-side code
- Bootstrap for layout and styling
And more description about the template project.
Now we want to change the UI of our Students application in the React app (ClientApp) as we want howt UI (user interface should be presented for Studenss).
Implementing React App
First we create the React app as UI for our students demo project.
First we need to create a Header component for our demo UI, and call it Header.js for the React application under ClientApp/src/components/
The code for Header.js, is shown in the following:
import React from 'react';
export const Header = () => {
    const headerStyle = {
        width: '100%',
        padding: '2%',
        backgroundColor: "yellowgreen",
        color: 'black',
        textAlign: 'center'
    }
    return(
        <div style={headerStyle}>
            <h1>Demo .NET as backend for React</h1>
        </div>
    )
}
Header.js
The next component is to create the Student Form: CreateStudent.js
Under : ClientApp/src/components/
The code for CreateStudent.js, is as following:
import React from 'react'
const CreateStudent = ({onChangeForm, createStudent }) => {
return(
<div className="container">
<div className="row">
<div className="col-md-7 mrgnbtm">
<h2>Create Student</h2>
<form>
<div className="row">
<div className="form-group col-md-6">
<label htmlFor="exampleInputEmail1">First Name</label>
<input type="text" onChange={(e) => onChangeForm(e)} className="form-control" name="firstname" id="firstname" aria-describedby="emailHelp" placeholder="First Name" />
</div>
<div className="form-group col-md-6">
<label htmlFor="exampleInputPassword1">Last Name</label>
<input type="text" onChange={(e) => onChangeForm(e)} className="form-control" name="lastname" id="lastname" placeholder="Last Name" />
</div>
</div>
<div className="row">
<div className="form-group col-md-12">
<label htmlFor="exampleInputEmail1">Email</label>
<input type="text" onChange={(e) => onChangeForm(e)} className="form-control" name="email" id="email" aria-describedby="emailHelp" placeholder="Email" />
</div>
</div>
<button type="button" onClick= {(e) => createStudent()} className="btn btn-danger">Create</button>
</form>
</div>
</div>
</div>
)
}
export default CreateStudent
CreateStudent.js,
We need two functions as props: onChangeForm and createStudent, that we could create our students in the UI. We create these functions in the App.js (under ClientApp/src/App.js).
We import also the two files: Header.js and CreateStudent.js to the app.js (which is the main model in React).
The whole code of app.js shall be as following. Remove the content of app.js and paste the following code: app.js
import React, { Component } from 'react';
import 'bootstrap/dist/css/bootstrap.min.css';
import './custom.css';
import { Header } from './components/Header'
import CreateStudent from './components/CreateStudent'
class App extends Component {
  state = {
    student: {},
    students: [],
    numberOfStudents: 0
  }
  createStudent = (e) => {
    createStudent(this.state.student)
      .then(response => {
        console.log(response);
        this.setState({numberOfStudents: this.state.numberOfStudents + 1})
    });
  }
  onChangeForm = (e) => {
    let student = this.state.student
    if (e.target.name === 'firstname') {
        student.firstName = e.target.value;
    } else if (e.target.name === 'lastname') {
        student.lastName = e.target.value;
    } else if (e.target.name === 'email') {
        student.email = e.target.value;
    }
    this.setState({student})
  }
  render() {
    return (
      <div className="App">
        <Header></Header>
        <div className="container mrgnbtm">
          <div className="row">
            <div className="col-md-8">
                <CreateStudent
                  onChangeForm={this.onChangeForm}
                  createStudent={this.createStudent}
                  >
                </CreateStudent>
            </div>
          </div>
        </div>
      </div>
    );
  }
}
export default App;
app.js
We need to create Display Board component to show the number of Students that has been created before. We create the DisplayBoard.js under ClientApp/src/components as follow:
import React from 'react'
export const DisplayBoard = ({numberOfStudents, getAllStudents}) => {
return(
<div style={{backgroundColor:'green'}} className="display-board">
<h4 style={{color: 'white'}}>Students Created</h4>
<div className="number">
{numberOfStudents}
</div>
<div className="btn">
<button type="button" onClick={(e) => getAllStudents()} className="btn btn-warning">Get all Students</button>
</div>
</div>
)
}
DisplayBoard.js
Update the App.js with DisplayBoard.js with importing of this file. then the App.js code shall be as follow:
import React, { Component } from 'react';
import 'bootstrap/dist/css/bootstrap.min.css';
import './custom.css';
import { Header } from './components/Header'
import CreateStudent from './components/CreateStudent'
import { DisplayBoard } from './components/DisplayBoard'
class App extends Component {
  state = {
    Student: {},
    Students: [],
    numberOfStudents: 0
  }
  createStudent= (e) => {
    createStudent(this.state.student)
      .then(response => {
        console.log(response);
        this.setState({numberOfStudents: this.state.numberOfStudens + 1})
    });
  }
  getAllStudents = () => {
    getAllStudents()
      .then(students => {
        console.log(students)
        this.setState({students: students, numberOfStudents: students.length})
      });
  }
  onChangeForm = (e) => {
    let student = this.state.student
    if (e.target.name === 'firstname') {
        student.firstName = e.target.value;
    } else if (e.target.name === 'lastname') {
        student.lastName = e.target.value;
    } else if (e.target.name === 'email') {
        student.email = e.target.value;
    }
    this.setState({student})
  }
  render() {
      return (
      <div className="App">
        <Header></Header>
        <div className="container mrgnbtm">
          <div className="row">
            <div className="col-md-8">
                <CreateStudent
                  onChangeForm={this.onChangeForm}
                  createStudent={this.createStudent}
                  >
                </CreateStudent>
            </div>
            <div className="col-md-4">
                <DisplayBoard
                  numberOfStudents={this.state.numberOfStudents}
                  getAllStudents={this.getAllStudents}
                >
                </DisplayBoard>
            </div>
          </div>
        </div>
      </div>
    );
  }
}
export default App;In the last, we will add the Student.js as a table which can show student information such as first name, last name, etc. in the UI:
Student.js under ClientApp/src/components as following code:
import React from 'react'
export const Students = ({students}) => {
console.log('students length:::', students.length)
if (students.length === 0) return null
const StudentRow = (student,index) => {
return(
<tr key = {index} className={index%2 === 0?'odd':'even'}>
<td>{index + 1}</td>
<td>{student.firstName}</td>
<td>{student.lastName}</td>
<td>{student.email}</td>
</tr>
)
}
const studentTable = students.map((student,index) => StudentRow(student,index))
return(
<div className="container">
<h2>Students</h2>
<table className="table table-bordered">
<thead>
<tr>
<th>Student Id</th>
<th>Firstname</th>
<th>Lastname</th>
<th>Email</th>
</tr>
</thead>
<tbody>
{studentTable}
</tbody>
</table>
</div>
)
}
Student.js
We need to create a Service (StudentService.js) that takes care of the communication between the React application (frontend) and an API backend API. A single service provides multiple functions to retrieve data from or post data to an external service using the HTTP protocol.
First we need to create a folder: Services and under this folder we create the StudentService.js as following:
/* Get all students from the database */
export async function getAllStudents() {
const response = await fetch('/api/Students');
return await response.json();
}
/* Create a student in the database */
export async function createStudent(data) {
const response = await fetch(`/api/student`, {
method: 'POST',
headers: {'Content-Type': 'application/json'},
body: JSON.stringify(data)
})
return await response.json();
}
StudentService.js
As we see from the code above there is two functions: getAllStudents() wich can retrieve all studens from t he database and createStudent which user can create a new student in the database.
We should import this files: Student.js and StudentService.js to app.js .
The final updated App Component (App.js) is as following:
import React, { Component } from 'react';
import 'bootstrap/dist/css/bootstrap.min.css';
import './custom.css';
import { Header } from './components/Header'
import { Students } from './components/Students'
import CreateStudent from './components/CreateStudent'
import { DisplayBoard } from './components/DisplayBoard'
import { getAllStudents, createStudent } from './services/StudentService'
class App extends Component {
state = {
Student: {},
Students: [],
numberOfStudents: 0
}
createStudent= (e) => {
createStudent(this.state.student)
.then(response => {
console.log(response);
this.setState({numberOfStudents: this.state.numberOfStudens + 1})
});
}
getAllStudents = () => {
getAllStudents()
.then(students => {
console.log(students)
this.setState({students: students, numberOfStudents: students.length})
});
}
onChangeForm = (e) => {
let student = this.state.student
if (e.target.name === 'firstname') {
student.firstName = e.target.value;
} else if (e.target.name === 'lastname') {
student.lastName = e.target.value;
} else if (e.target.name === 'email') {
student.email = e.target.value;
}
this.setState({student})
}
render() {
return (
<div className="App">
<Header></Header>
<div className="container mrgnbtm">
<div className="row">
<div className="col-md-8">
<CreateStudent
onChangeForm={this.onChangeForm}
createStudent={this.createStudent}
>
</CreateStudent>
</div>
<div className="col-md-4">
<DisplayBoard
numberOfStudents={this.state.numberOfStudents}
getAllStudents={this.getAllStudents}
>
</DisplayBoard>
</div>
</div>
</div>
<div className="row mrgnbtm">
<Students students={this.state.students}></Students>
</div>
</div>
);
}
}
export default App;
final app.js
That was all for implementing of React App for our Student demo app..
Implementing .NET Web API
We have implemented UI (User Interface) in the React app and now we will create a Web API with ASP.NET Core.
First we need Install package Microsoft.AspNetCore.SpaServices.Extensions which Provides types for hosting a Single Page Application (SPA).
This package make possible to integrate client-side SPA frameworks or libraries, such as Angular or React, with server-side frameworks such as ASP.NET Core can be difficult. It enables seamless operation between the different client and server technology stacks.
Install this package with following command:
dotnet add package Microsoft.AspNetCore.SpaServices.Extensions
After running this command the package: Microsoft.AspNetCore.SpaServices.Extensions is created under dependencies.packages
Then we create a new folder:Models and under this folder we create StudentModel class as a data model for our Students Demo projec. below.
Here is the code for StudentModel.cs class:
namespace Student.Models
{
    public class StudentModel
    {
        public int Id { get; set; }

      public string firstName { get; set; }
        public string lastName { get; set; }
        public string email { get; set; }
    }
}
We have to create a repository class that can store students data in memory. We will not use any database in this Project (Students).
StudentRepository.cs class Under Models Folder
using System;
using System.Collections.Generic;
namespace Students.Models
{
public class StudentRepository: IStudentRepository
{
private List<StudentModel> students = new List<StudentModel>();
private int _nextId = 1;
public StudentRepository()
{
Add(new StudentModel { firstName= "first1", lastName="last1", email="email1@gmail.com"});
Add(new StudentModel { firstName= "first2", lastName="last2", email="email2@gmail.com"});
Add(new StudentModel { firstName= "first3", lastName="last3", email="email3@gmail.com"});
}
public IEnumerable<StudentModel> GetAll()
{
return students;
}
public StudentModel Add(StudentModel item)
{
if (item == null)
{
throw new ArgumentNullException("item");
}
item.Id = _nextId++;
students.Add(item);
return item;
}
}
}
We need also to createInterface IStudentRepository.cs Class under Models folder:
using System;
using System.Collections.Generic;
namespace Students.Models
{
public interface IStudentRepository
{
IEnumerable<StudentModel> GetAll();
StudentModel Add(StudentModel student);
}
}
We should create the Startup.cs class (.NET 6 doesn’t create startup class by default.
We should app.UseSpa to interact from .NET Core app to React app by this we gives the SourcePath to the “ClientApp” folder in the React app, by adding following code:
app.UseSpa(spa =>
{
spa.Options.SourcePath = "ClientApp";
if (env.IsDevelopment())
{ spa.UseReactDevelopmentServer(npmScript: "start");
}
});
The whole code for Startup.cs is as following:
using Microsoft.AspNetCore.Builder;
using Microsoft.AspNetCore.Hosting;
using Microsoft.AspNetCore.HttpsPolicy;
using Microsoft.AspNetCore.SpaServices.ReactDevelopmentServer;
using Microsoft.Extensions.Configuration;
using Microsoft.Extensions.DependencyInjection;
using Microsoft.Extensions.Hosting;
namespace Students
{
public class Startup
{
public Startup(IConfiguration configuration)
{
Configuration = configuration;
}
public IConfiguration Configuration { get; }
// This method gets called by the runtime. Use this method to add services to the container.
public void ConfigureServices(IServiceCollection services)
{
services.AddControllersWithViews();
// In production, the React files will be served from this directory
services.AddSpaStaticFiles(configuration =>
{
configuration.RootPath = "ClientApp/build";
});
}
public void Configure(IApplicationBuilder app, IWebHostEnvironment env)
{
if (env.IsDevelopment())
{
app.UseDeveloperExceptionPage();
}
else
{
app.UseExceptionHandler("/Error");
// The default HSTS value is 30 days. You may want to change this for production scenarios, see https://aka.ms/aspnetcore-hsts.
app.UseHsts();
}
app.UseHttpsRedirection();
app.UseStaticFiles();
app.UseSpaStaticFiles();
app.UseRouting();
app.UseEndpoints(endpoints =>
{
endpoints.MapControllers();
});
app.UseSpa(spa =>
{
spa.Options.SourcePath = "ClientApp";
if (env.IsDevelopment())
{
spa.UseReactDevelopmentServer(npmScript: "start");
}
});
}
}
}
Creating the Controller class: StudentsController.cs
Under Controller, change the name of WeatherForecast to StudentsController and past the following code:
using System;
using System.Collections.Generic;
using System.Linq;
using System.Net;
using System.Net.Http;
using System.Threading.Tasks;
using Microsoft.AspNetCore.Mvc;
using Microsoft.Extensions.Logging;
using Students.Models;
namespace Students.Controllers
{
[ApiController]
public class StudentsController : ControllerBase
{
private readonly ILogger<StudentsController> _logger;
static readonly IStudentRepository repository = new Students.Models.StudentRepository();
public StudentsController(ILogger<StudentsController> logger)
{
_logger = logger;
}
// GetAllStudents() method to retrieve all Students

[HttpGet]
[Route("api/students")]
public IEnumerable<StudentModel> GetAllStudents()
{
return repository.GetAll();
}
// PostStudent() method to create a new student.

[HttpPost]
[Route("api/student")]
[Consumes("application/json")]
public Models.StudentModel PostStudent(Models.StudentModel item)
{
return repository.Add(item);
}
}
}How to run this application?
You can run and test the application both via Visual Studio 2022 (even VS code) or by command line.
Here is how to run and test it via command line.
dotnet run, you can access the APIs as below.
As you see in the above there are two url: https://localhost:5001 and http://localhost:5000
If you open a browser and paste https://localhost:5001 then you should access to the React API (UI) as follow:

How does Interaction works Between .NET API and React?
When you run the command dotnet run,you can access the React App with the two URIs as we sow above.
https://localhost:5001

http://localhost:5000
You can access APIs with the same port with the context path /api.
http://localhost:5000/api/users (Get Request)
http://localhost:5000/api/user (Post Request)
This feature is provide by .NET as default if template is generated with the following command as we done in the beginning of this post.
dotnet new react -o <project name>
The interact between React and API has been done, in Startup.cs ( line 58, we are using the UseSpa method to give the React folder ClientApp.
app.UseSpa(spa =>
{
spa.Options.SourcePath = "ClientApp";
By this way, we can access the React app on ports 5000 (http) and 5001(HTTPS), to access to the UI.

How to publish For Production
Publish can be done to package the whole app for production by the following command.
dotnet publish -c Release -o published
This command first builds and then publishes:
If you got the following Error:
error MSB3073: The command "npm install" exited with code 1.
Then remove the npm install from the project file.
published folder contains the whole app packaged
The configuration is done in the Startup.cs file that built React code is under the folder ClientApp/build:
// In production, the React files will be served from this directory
services.AddSpaStaticFiles(configuration =>
{
configuration.RootPath = "ClientApp/build";
});
The published folder contains the follwoings:

Run the following command to start the application.
dotnet published/Student.dll

Now start browse with https://localhost:5001

Conclusion
In this post I have explained how to build React App with ASP.NET Core, I have create a project template via command line which create us an ASP.NET Core app and a React app. The React app code is in the ClientApp subdirectory, and it is used for UI. The ASP.NET Core app is used for data access, authorization, and other server-side. I have modified this template to adapt our Demo project.
In this project is used some kind of mechanism that loads the index.html (single page) of React with all the dependencies(CSS and js files) in the browser, by .NET core API.
This post is part of “React-Step by step”.